N E W 5 - O C T A V E H A R P S I C H O R D S
I N T H E N E A P O L I T A N S T Y L E
Decorative Rosettes on Italian Keyboard Instruments
W. D. Hendry
One of the most fascinating and universally admired parts of a keyboard instrument, particularly in instruments of the Italian school, is the decorative rosette on the soundboard. This intricate ornament serves no known acoustical purpose and indeed is not even present on many instruments. However, its presence, especially in Italian instruments with a wide expanse of unpainted soundboard, adds visual interest to this otherwise plain feature. The Russell Collection of Early Keyboard Instruments contains many very fine examples of Italian rosettes and the material of this article is based on my own experience making copies of wood/parchment rosettes from Italian instruments in this and other collections. The cast metal roses favoured by the Northern European makers are not discussed.
It is believed that makers of keyboard instruments would not, in most cases, have made the rosette themselves but would have purchased it from specialist rosette makers in the same way that strings, ironware and sometimes jacks were ‘bought in’. It is known for example that a number of instruments made in Venice, by different makers, all have the same style and design of rosette. Italian makers used three materials when practising their art -- carved wood, parchment or a specially prepared sandwich of wood and parchment. Parchment is very fine animal skin and is available from various animals, sheep and goat being the beasts which produce the finest skins. Parchment is an expensive material today because of the trouble involved in its preparation and there is no reason to assume that it would not have been costly in the 16th and 17th centuries.
Study of the patterns and structure of rosettes used by Italian makers has revealed that certain designs are characteristic of various regions in Italy. Some, like the instruments of Gianfrancesco Antegnati of Brescia and Annibale de’ Rossi (Milan), are cut from the soundboard wood itself and have added decoration incised or punched into the soundboard. Some have a layered parchment ring, resembling a doily (sometimes with wooden rings on top) glued to the surface of the soundboard and with another layered parchment design glued under the soundboard. In some, the rosette is completely contained below the soundboard. In these, the rosette is attached to the lower surface of a wooden ring and this is then let into a circular hole cut in the soundboard. The Pisaurensis rosette is an example of this type. Much work remains before the regional variations are catalogued and fully understood.
Construction of Italian parchment and parchment/wood rosettes.
Making a replica of an Italian rosette starts with two observations. First, the underlying geometry of the pattern must be worked out. Most rosettes use a repeating symmetrical pattern based on the circle. (An exception to this is the very early Clavicytherium from the RCM Collection). Rosettes often have a three-fold or six-fold symmetry with internal circles that are 1/3 the diameter of the rosette itself.
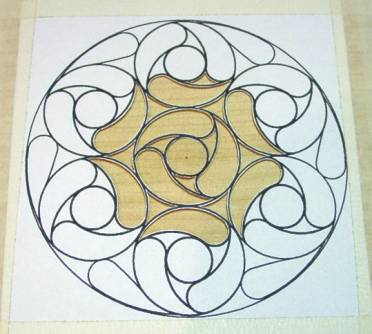
The rosette from the Dominicus Pisaurensis, Venice, c.1565 instrument shown below
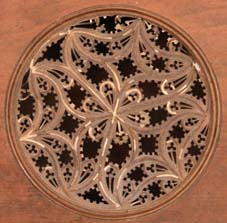
uses the pattern seen in the drawing below. After much analysis, trial and error it eventually revealed its secret. The whole pattern can be drawn out using nothing but two discs of card or metal whose diameters are 1/3 and ½ that of the whole. There is not enough room here to explain this fully.
These drawings shows 4 stages in the design of the four-layered Pisaurensis rosette.
Once these observations have been made and the rose has been completely drawn the process of construction can begin.
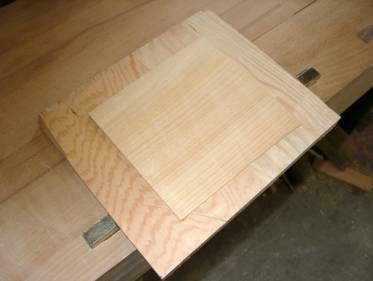
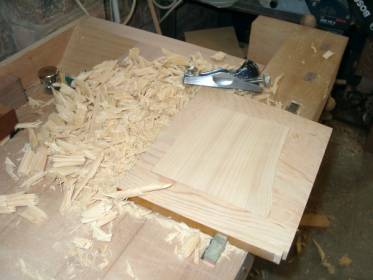
The first stage in making a rosette such as this one is to produce a thin piece of planed cypress wood a little bigger than the finished rosette. With care, the wood can be planed to about 1mm thick. Having planed the wood as thin as possible, the next stage is to glue a piece of parchment to the underside. This parchment serves no visual purpose but prevents the wood from cracking during the next stage. The wood/parchment is then reduced in thickness to around 0.3mm. (For those who find it hard to visualize such a thickness, 0.3mm is close to the thickness of an average calling card.) Reducing the thickness can be done using abrasive paper of various grades or with careful use of a sanding machine. A much slower but equally effective method is to use pieces of broken glass to ‘scrape’ the wood. The technical problems encountered in achieving a layer of wood of this thickness are considerable.
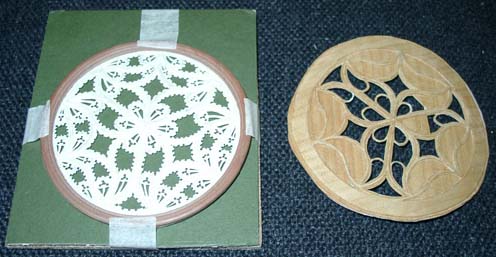
Second, using magnification if required, it is necessary to discover how many layers are involved in creating the stepped, three-dimensional appearance of the rosette. Most rosettes are built in layers, commonly three or four layers. From this point onwards the main requirements from the rosette maker are good eyesight and lots of patience. A drawing of the pattern is made on paper. The paper drawing is taped to the first parchment/wood layer and using a sharp knife, the first layer of the rosette is cut out. This results an extremely thin and delicate web-like structure resembling the drawing above. The upper layer freshly cut, is then glued to another layer of parchment/wood and the process repeated, this time cutting round the first pattern leaving a small ‘step’. (See the greatly enlarged section below). By this stage, the rosette is already amazingly robust and can be handled without fear of breaking it.
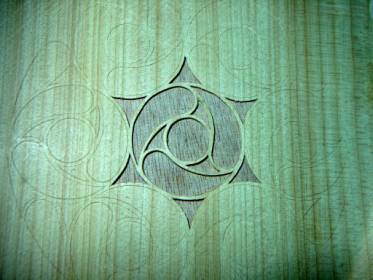
The final stage, and the one which is most fun, is the making of the bottom layer. This highly decorative layer is made using a fine knife and a set of specially-made punches. These tiny punches are cut from small pieces of steel rod using files and drills to achieve the shape required.
The pattern is then punched out, using end-grain boxwood as a support for the material. No other wood seems to work as well as boxwood for this purpose and this is explained by the fact that boxwood is very dense and hard, has very close annual rings and just the right amount of ‘give’ to produce a sharp clean appearance to the cut edges.
The next time you visit the Russell Collection take some time to look at the rosettes in the Italian instruments. For delicacy of construction, view the Bertolotti. For amazing three-dimensional depth, look into the little Orlandus ottavino. To spot the underlying parchment support, look for the broken pieces visible in the Italian polygonal virginal by Dominicus Pisaurensis.
I would like to acknowledge the encouragement and help given to me by Dr Grant O’Brien both in allowing access to the instruments and for proofreading this article.
Return to the previous section